On this page
Spring hiking means planning for mixed conditions: mud on lower trails, lingering snow and ice higher up, fast, cold streams swollen by snowmelt and weather that can swing from warm sun to freezing rain in one afternoon. Check current trail conditions, dress in layers, protect wet trails by walking through the mud, and be ready to turn back.
Spring is a wonderful time to hike. Trails are quieter than in summer, wildflowers start to bloom and waterfalls run at their fullest. It is also a season of change, where a trail can be dry at the trailhead and buried in slushy snow a short climb above. This guide covers what to expect on the trail in spring, how to read conditions before you go and how to handle mud, snowmelt and water crossings safely.
Key takeaways
- Trail conditions in spring vary by elevation, sun exposure and recent weather, so always check recent reports before you go.
- Walk through the middle of muddy trails instead of around them to avoid widening the path and damaging plants.
- Snow can linger well into late spring on shaded slopes and higher ground, often softening into slush by afternoon.
- Snowmelt can make streams deep, fast and very cold, and it is safer to turn back than to risk a dangerous crossing.
- Layers, waterproof outerwear, traction aids where needed and tick checks are spring essentials.
What should you expect when hiking in spring?
When hiking in spring, you should expect a mix of conditions on a single trail: dry dirt in sunny spots, deep mud in shaded or low areas, patches of snow or ice at higher elevations and streams running high with snowmelt. Weather can change quickly, with warm afternoons, cold mornings and sudden rain or late snow.
Spring arrives unevenly. Lower valleys and south facing slopes in the Northern Hemisphere melt out first, while north facing slopes, dense forest and higher ground hold snow much longer. That means the trail you hiked easily in autumn may be a very different route in April or May.
Common spring trail conditions include:
- Mud: thawing ground holds water near the surface, creating soft, slippery and deep mud.
- Snow and slush: lingering snow softens in the sun, making footing unstable and tiring.
- Ice: shaded sections can stay frozen, especially in the early morning.
- High water: streams fed by snowmelt rise through the day and can cover trails or bridges.
- Blowdowns: winter storms can leave fallen trees across trails before crews clear them.
- Seasonal closures: some trails close to protect wildlife or fragile ground during the thaw.
How do you check spring trail conditions before a hike?
You check spring trail conditions by contacting the land manager, reading recent trail reports and looking at the forecast for the trail’s elevation. Park and forest websites often post closures, snow levels and road status. Recent hiker reports help you know whether to expect mud, snow, ice or high water before you leave home.
Use these steps before every spring hike:
- Visit the website or call the office of the park or forest that manages the trail.
- Look for alerts on closures, washouts, bridge damage or seasonal road gates.
- Read recent trip reports from hikers, paying attention to their date.
- Check the forecast for the trail’s highest point, not only the nearest town, using a source such as the National Weather Service.
- Note sunrise and sunset times so you can finish in daylight.
- Have a backup trail at lower elevation in case your first choice is still snowed in.
In mountain areas with steep, snowy slopes, avalanche risk can remain into spring. If your route crosses or sits below avalanche terrain, check your regional avalanche forecast and avoid those areas unless you have training and the right equipment. For more on reading forecasts and preparing for sudden changes, see our guide on how to prepare for changing trail weather.
Tip: Plan spring hikes like an early season trip, not a summer one. Start with low elevation, sunny trails, and save higher routes for later in the season when reports show they have melted out.
How should you hike through mud in spring?
You should hike through mud by walking straight through the middle of the trail rather than stepping around the edges. Going around widens the path, tramples plants and causes long-term erosion. Wear footwear you do not mind getting dirty, use gaiters to keep mud out, and consider skipping very muddy trails entirely until they dry.
Muddy spring trails are easily damaged. When many hikers step around a mud hole, the trail gets wider each year and fragile soil and plants at the edges are lost. Leave No Trace guidance from lnt.org encourages hikers to stay on the trail, even when it is wet.
Practical tips for muddy trails:
- Wear shoes or boots with deep lugs for grip.
- Use gaiters to keep mud from going over the top of your footwear.
- Take shorter steps on slippery sections and keep your weight over your feet.
- Use trekking poles for balance on soft or slick ground.
- Step on rocks only if they are part of the trail and stable.
- Clean your footwear afterward to prevent spreading seeds of invasive plants.
Some land managers ask hikers to avoid certain trails entirely during mud season to prevent damage. If a trail is posted closed or a ranger asks you to wait, choose a more durable route such as a gravel path, rocky ridge or paved trail until conditions improve.
How do you handle snow and ice on spring trails?
You handle snow and ice on spring trails by checking reports, bringing traction aids such as microspikes when ice is likely, and timing your hike so you cross snow while it is firm. Spring snow often freezes overnight and softens by afternoon, which can make it slippery in the morning and exhausting slush later in the day.
Spring snow behaves differently from winter powder. Key things to know:
- Morning ice: refrozen snow and ice can be very slippery early in the day.
- Afternoon slush: warm sun turns snow soft and wet, so you may sink with each step, often called postholing.
- Hidden hazards: snow can cover holes, streams and gaps around rocks and logs, and these snow bridges can collapse.
- Lost trails: snow can hide trail markers and tread, making navigation harder.
- Steep slopes: hard snow on steep terrain can be dangerous without proper skills and equipment.
Bring a map and know how to use it, or carry a navigation app with offline maps, because trails under snow can be hard to follow. Our guide to basic navigation with a map and compass covers the basics.
If you reach a steep, icy or snow covered section that feels beyond your skills or equipment, turn around. Choosing a different trail is always better than risking a fall.
How do you cross streams safely during snowmelt?
You cross streams safely during snowmelt by checking the water before you commit, crossing at a wide, shallow and slow spot, and turning back if the water is fast, deep or murky. Snowmelt makes streams very cold and powerful, and levels often rise through the afternoon. When in doubt, do not cross.
Snowmelt fed water is one of the most serious spring hazards. Even knee deep water can knock you off your feet if it is moving quickly, and cold water drains energy fast. Follow these steps if you decide a crossing is reasonable:
- Scout up and downstream for a wider, shallower and calmer spot.
- Look for hazards downstream, such as logs, waterfalls or rapids, and do not cross above them.
- Unbuckle your pack’s hip belt and loosen the shoulder straps so you can remove it if you fall.
- Keep your shoes on for grip and protection.
- Face upstream and use trekking poles or a sturdy stick for a third point of contact.
- Move one foot at a time, making sure each step is secure before shifting weight.
- Cross early in the day when possible, since snowmelt streams often run lower in the morning.
If water is above your knees, fast, loud with rolling rocks or too murky to see the bottom, turn back. Remember that a stream you crossed easily in the morning may be higher on the return trip.
Tip: Treat the bridge symbols on older maps with caution in spring. Winter storms and high water can damage or wash out footbridges, so check recent reports before relying on one.
What should you wear for spring hiking?
You should wear layers for spring hiking: a moisture-wicking base layer, an insulating mid layer and a waterproof, breathable jacket. Spring temperatures change quickly between shade and sun and between the trailhead and higher ground. Layering lets you add or remove warmth as you go so you stay comfortable and avoid getting chilled from sweat.
A good spring layering system includes:
| Layer | Purpose | Spring tips |
|---|---|---|
| Base layer | Moves sweat away from skin | Choose merino or synthetic, not cotton |
| Mid layer | Holds warmth | Fleece or a light insulated jacket |
| Shell | Blocks wind and rain | Waterproof jacket, and rain pants on wet days |
| Hat and gloves | Protect extremities | Light pairs for cold mornings and windy summits |
| Socks | Comfort and warmth | Wool or synthetic, with a spare pair |
| Footwear | Grip and protection | Lugged soles, waterproof if snow or puddles are likely |
| Gaiters | Keep out mud and snow | Low or mid gaiters |
Cotton holds water and loses its warmth when wet, which can be risky in cold, damp spring weather. For a full explanation of how layers work together, read our guide on outdoor clothing layering basics.
Sun protection matters in spring too. Snow and water reflect sunlight, and many hikers underestimate how strong the sun can feel on a clear spring day. Pack sunglasses, sunscreen and a hat.
How do you stay safe in spring weather?
You stay safe in spring weather by preparing for both cold and warmth on the same hike. Early season temperatures can drop sharply in rain or wind, raising hypothermia risk, while sunny afternoons can feel surprisingly hot. Watch the forecast, carry extra layers and water, and turn back if conditions change faster than expected.
Cold, wet and windy weather is the classic spring hazard. Wet clothing and wind pull heat from your body quickly, even when temperatures are above freezing. Know the early warning signs of hypothermia, such as uncontrollable shivering, clumsiness and confusion. If you or someone with you shows these signs, get them out of the wind and wet, add dry layers and warmth, and seek emergency help if symptoms are severe or do not improve. Our guide on how to prevent hypothermia on the trail explains the risks in more detail.
On the other hand, spring heat can catch hikers off guard after a cool winter, especially on exposed trails in lower or desert regions. Drink regularly, rest in shade and learn the signs of heat illness. See our guide to heat safety for hikers before warm weather hikes.
Spring is also the start of thunderstorm season in many regions. If you hear thunder, move off exposed ridges and summits right away. Our guide to lightning safety for hikers and campers covers what to do.
What other spring hazards should hikers know about?
Other spring hazards hikers should know about include ticks, waking wildlife, early season trail damage and shorter days early in the season. Ticks become active as temperatures rise, animals are more active after winter and trails may not have been cleared yet. Planning for these keeps your hike safe and enjoyable.
Ticks
Ticks are active in many regions from spring onward. The CDC recommends steps such as using an EPA-registered insect repellent, staying on the center of trails and checking your body and gear for ticks after a hike. Remove any attached tick promptly with fine-tipped tweezers. Talk to a doctor if you develop a rash, fever or other symptoms in the weeks after a bite.
Wildlife
Many animals are active in spring, including bears emerging from winter dens in bear country and animals protecting young. Keep a safe distance, store food properly and follow local guidance. Our guide to wildlife safety on the trail explains how to respond to common encounters.
Trail damage and daylight
Fallen trees, washouts and damaged bridges are common before trail crews finish spring maintenance. Days are also still shorter in early spring than in summer. Start early, carry a headlamp and leave extra time.
What are the most common spring hiking mistakes?
The most common spring hiking mistakes are relying on old trail information, underestimating snow at higher elevations, walking around mud and attempting risky stream crossings. Many problems come from planning a spring hike as if it were summer. Checking conditions, choosing lower trails early in the season and being willing to turn back prevent most issues.
Avoid these mistakes:
- Using last season’s information. Conditions change from year to year and week to week.
- Ignoring elevation. A dry trailhead does not mean a dry summit.
- Stepping around mud. It widens and damages the trail.
- Wearing cotton. It stays wet and cold in spring rain.
- Pushing through dangerous crossings. No view is worth the risk.
- Starting late on snowy routes. Afternoon slush is slow and tiring.
- Skipping the ten essentials. Spring weather makes extra layers, light and navigation especially valuable.
How does spring hiking compare with other seasons?
Spring hiking compares with other seasons as the most variable time on the trail. Summer is usually drier and more predictable but busier, while fall brings cooler temperatures and shorter days. Spring combines winter leftovers with early summer warmth, so it rewards flexible plans, careful condition checks and a willingness to adjust your route.
| Season | Typical trail conditions | Main planning focus |
|---|---|---|
| Spring | Mud, snowmelt, high water, mixed weather | Condition checks, layers, flexible routes |
| Summer | Drier trails, heat, storms in some regions | Water, sun, early starts |
| Fall | Cooler air, leaves on trails, shorter days | Daylight, warm layers, hunting seasons |
| Winter | Snow, ice, cold and limited daylight | Traction, warmth, avalanche awareness |
If you enjoy shoulder season hiking, our guide to fall hiking tips covers the other transition season and how to prepare for it. For a complete safety kit list for any season, review the ten essentials for hiking.
Frequently asked questions
Is spring a good time to go hiking?
Spring can be a great time to go hiking, with fewer crowds, blooming wildflowers and full waterfalls. It also brings mud, lingering snow, high streams and changeable weather. Start with low elevation, sunny trails, check recent conditions and carry extra layers so you can enjoy the season safely.
Should you walk through mud or around it on a trail?
You should walk through mud on a trail rather than around it. Stepping around muddy sections widens the trail, damages plants along the edges and causes erosion. Wear footwear you do not mind getting dirty and use gaiters. If a trail is extremely muddy or closed, choose a more durable route instead.
Do I need microspikes for spring hiking?
You may need microspikes for spring hiking if recent reports mention ice or hard, packed snow on your route, especially on shaded or higher sections. They add grip on icy trails. Microspikes are not designed for steep, technical snow slopes, so turn back if terrain looks steeper than you are equipped for.
What is mud season in hiking?
Mud season is the period in spring when snow melts and the ground thaws, leaving trails soft, wet and easily damaged. It often affects forests and mountains in northern climates. Some land managers ask hikers to avoid certain trails until they dry, so check local guidance before you go.
When is it unsafe to cross a stream?
It is unsafe to cross a stream when the water is fast, deeper than your knees, loud with rolling rocks or too murky to see the bottom. Snowmelt makes streams cold and powerful, and levels often rise in the afternoon. If you have any doubt, turn back or find a safer route.
Sources and further reading
- National Weather Service
- Leave No Trace Center for Outdoor Ethics
- Centers for Disease Control and Prevention
- National Park Service
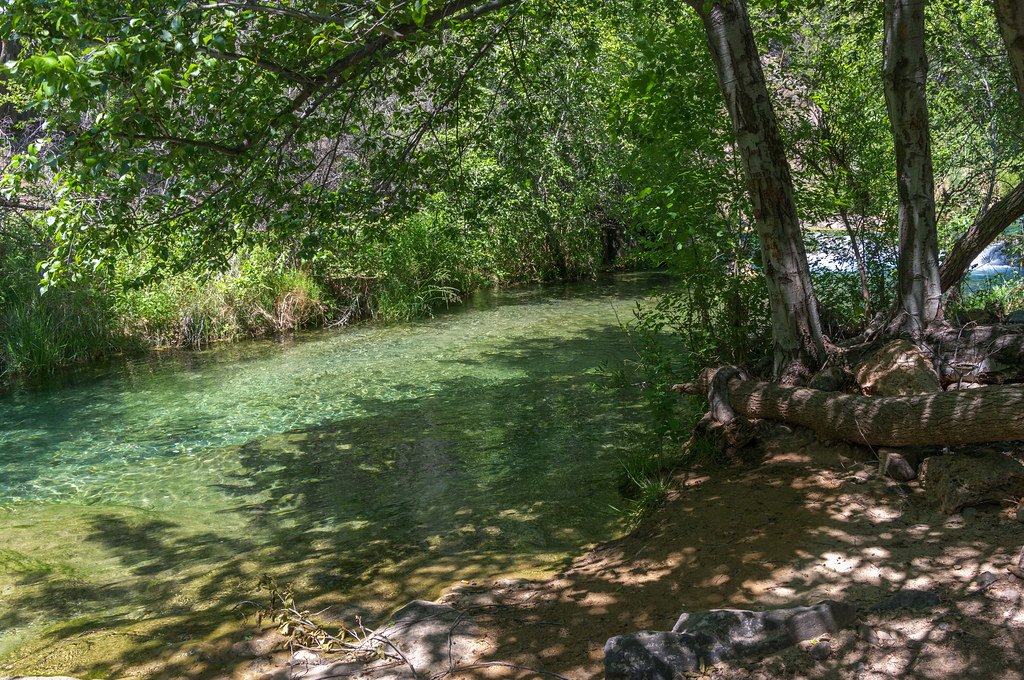
Featured photo: Coconino NF Photography via Openverse (CC0).