On this page
The most useful first aid skills for hikers are checking a scene and a person safely, calling for help with a clear location, treating blisters, cleaning and dressing wounds, controlling bleeding, supporting sprains, and recognizing heat illness, hypothermia and allergic reactions early. Pair those skills with a well-stocked kit and a formal first aid course, and you can handle most minor problems and buy time for serious ones.
This guide explains each skill in plain steps, with tables for quick reference and clear notes on when to call for emergency help. It is general guidance, not medical training. A hands-on course from an organization such as the American Red Cross is the best way to build real confidence.
Key takeaways
- Start every incident the same way: make sure the scene is safe, check the person, then call for help if needed.
- Know how to give your exact location. Save trail names, junctions and coordinates before you go.
- Blisters, cuts and sprains are the most likely problems on a day hike. Treat hot spots before they become blisters.
- Firm, direct pressure is the first step for heavy bleeding. Call for emergency help right away.
- Learn the warning signs of heat illness and hypothermia, and act early. Both can become emergencies.
- Carry a personalized first aid kit and take a wilderness first aid course if you hike often or far from roads.
What first aid skills do hikers need most?
The first aid skills hikers need most are assessing an emergency, calling for help, blister care, wound cleaning, bleeding control, splinting sprains, and spotting heat illness, hypothermia and allergic reactions. These cover the injuries and illnesses most likely on a trail, where help can be far away and you may need to manage a problem for some time.
First aid on a trail differs from first aid in town. In a city, an ambulance may arrive quickly. On a trail, you may be hours from a road, without cell signal, in changing weather. That means you need to keep someone safe, warm and stable for longer, and make sound decisions about whether to walk out or wait for help.
Here is a quick overview of the core skills and why they matter:
| Skill | Why it matters on a trail |
|---|---|
| Scene and patient check | Prevents a second injury and guides your next step |
| Calling for help | Rescuers need a clear location and description |
| Blister care | Small foot problems can end a hike or slow you dangerously |
| Wound cleaning and dressing | Reduces infection risk far from medical care |
| Bleeding control | Heavy bleeding needs fast action |
| Sprains and splints | Supports an injury so a person can move or wait safely |
| Heat and cold illness | Weather problems can become serious quickly |
| Allergic reactions | Severe reactions need emergency treatment |
First aid supplies are part of the gear every hiker should carry. Our guide to the Ten Essentials for hiking explains where a first aid kit fits alongside navigation, light, insulation and water.
How do you assess an injured hiker?
To assess an injured hiker, first check that the area is safe for you, then check the person for responsiveness, breathing and serious bleeding. Call for emergency help if anything looks serious. The American Red Cross teaches this as Check, Call, Care: check the scene and person, call for help, then give care until help arrives.
- Stop and look around. Watch for falling rocks, unstable ground, water, traffic on roads, lightning or wildlife. Do not become a second casualty.
- Check responsiveness. Speak to the person and ask what happened. Tap their shoulder if they do not respond.
- Check breathing. If the person is unresponsive and not breathing normally, call for help immediately and begin CPR if you are trained.
- Look for severe bleeding. Control it with firm, direct pressure before anything else.
- Ask about pain and how it happened. A fall from height or a blow to the head raises concern for head, neck or back injuries.
- Avoid moving someone with a suspected spine injury unless they are in immediate danger where they are.
- Protect them from the weather. Put insulation underneath and around them, and shelter them from sun, wind or rain.
- Write things down. Note the time, what happened and any changes. Rescuers and doctors find this helpful.
A simple shelter can make a long wait far safer. Learning how to pitch a tarp shelter gives you a way to keep an injured person dry while you wait.
How do you call for help on a hiking trail?
To call for help on a hiking trail, call the local emergency number if you have signal, give your exact location, describe the injury and stay on the line. Without signal, use a satellite messenger or personal locator beacon if you carry one, or send others to get help while someone stays with the injured person.
What to tell emergency services
- Your exact location: trail name, nearest junction or landmark, and coordinates if your phone or GPS shows them
- What happened and when
- How many people are hurt and their main injuries
- Whether the person is conscious and breathing
- Weather conditions and how many people are in your group
- Your phone number and battery level
If you have no signal
A text message can sometimes get through when a call cannot, so try both. In the US, many areas support texting 911, but not all, so call when you can. If you carry a satellite messenger or personal locator beacon, follow its instructions to send an SOS.
If you need to send people for help, send at least two together if possible. Give them a written note with the location, the injury and the time. Leaving a detailed plan before every hike makes this easier, and our guide on how to leave a hiking plan with someone shows what to include.
Being able to pinpoint your location matters as much as treating the injury. Our guide to basic navigation with a map and compass helps you read your position even when your phone fails.
How do you treat blisters and hot spots?
Treat hot spots and blisters by stopping as soon as you feel rubbing, drying the skin and covering the area before a blister forms. If a blister has formed, protect it with a blister dressing or padding and reduce friction. Keep it clean, and watch for signs of infection such as spreading redness, warmth, swelling or pus.
- Stop at the first sign of rubbing. A few minutes now can save the rest of your hike.
- Take off your boot and sock. Let the skin dry.
- Cover a hot spot. Use moleskin, tape or a blister dressing directly over the area.
- Protect an intact blister. Many sources advise leaving it intact when possible, since the skin acts as a natural cover. Use a padded dressing or donut-shaped padding around it.
- Care for a torn blister. Clean the area gently, cover it with a sterile dressing, and keep it clean.
- Fix the cause. Change into dry socks, adjust lacing, or fix a fold in your sock.
Tip: Put blister supplies at the top of your kit so you actually stop to use them. Many hikers keep walking on a hot spot because their kit is buried in their pack.
Prevention matters most. Well-fitted footwear and good socks prevent many blisters. See our guides on how to choose hiking socks and how to break in hiking boots.
How do you clean and dress cuts and scrapes?
To clean and dress cuts and scrapes on a hike, wash your hands or put on gloves, stop any bleeding with gentle pressure, rinse the wound with plenty of clean water, then cover it with a sterile dressing. Cleaning is the most important step, because dirt in a wound raises the risk of infection when you are far from care.
- Protect yourself. Wash your hands or wear disposable gloves from your kit.
- Stop the bleeding. Apply gentle, steady pressure with a clean dressing.
- Rinse thoroughly. Use plenty of clean, safe drinking water to flush out dirt. A syringe or squeezed water bottle can help.
- Remove visible debris carefully. Use clean tweezers for small particles near the surface.
- Cover the wound. Use a sterile dressing or adhesive bandage, held in place with tape if needed.
- Check it regularly. Change wet or dirty dressings and look for signs of infection.
If you are not sure your water is safe, treat it first. Our guide on how to purify water in the backcountry explains filtering, boiling and chemical treatment.
Seek medical care for deep wounds, wounds that gape open, animal bites, puncture wounds, wounds with embedded debris, or any wound showing spreading redness, warmth, swelling, pus or fever.
How do you control serious bleeding?
To control serious bleeding, call for emergency help immediately, then press firmly and directly on the wound with a clean dressing or cloth and keep pressing. If blood soaks through, add more material on top without removing the first layer. A tourniquet may be needed for severe limb bleeding, ideally applied by someone trained to use one.
- Call for help first or have someone else call while you apply pressure.
- Press hard and keep pressing. Do not lift the dressing to check.
- Add layers. If blood soaks through, place more dressings on top.
- Use a pressure bandage once bleeding slows, wrapping firmly but not so tight that fingers or toes turn pale, cold or numb.
- Keep the person warm and lying down. Blood loss can lead to shock.
Tourniquets and wound packing are skills best learned in a course with hands-on practice. Programs such as Stop the Bleed in the US teach these techniques.
How do you handle sprains and suspected fractures?
To handle a sprain or suspected fracture on a hike, stop activity, support the injured area, and avoid putting weight on it if movement causes significant pain. Immobilize it with a splint made from padding and rigid items such as trekking poles or a sleeping pad. Seek medical care if you suspect a fracture or cannot bear weight.
For a sprained ankle or knee
- Stop and rest. Continuing to walk on a bad sprain can make it worse.
- Check the injury. Look for obvious deformity, severe swelling or inability to move the joint.
- Cool it. A cold stream or wet cloth can help ease swelling. Do not put ice directly on skin.
- Compress and support. An elastic bandage or tape can provide support.
- Raise it when resting. Prop the injured limb up if comfortable.
- Decide on walking out. A minor sprain may allow a slow walk with trekking poles and help. A severe one may need rescue.
For a suspected fracture
- Do not try to straighten a deformed limb.
- Splint the limb in the position you found it, padding the gaps.
- Include the joints above and below the injury in the splint.
- Check fingers or toes for warmth, color and feeling after splinting.
- Call for help, especially if the person cannot walk.
Knots matter here. Tying secure, adjustable knots helps you hold a splint or sling in place, and our guide to essential outdoor knots for beginners covers the basics.
How do you recognize heat illness and hypothermia?
Recognize heat illness and hypothermia by watching for early changes in behavior and body temperature. Heat exhaustion often shows as heavy sweating, weakness, dizziness and nausea. Heat stroke can cause confusion and is a medical emergency. Hypothermia often starts with shivering, fumbling and poor judgment. Act early in both cases.
| Condition | Common signs | What to do |
|---|---|---|
| Heat exhaustion | Heavy sweating, weakness, dizziness, nausea, headache | Move to shade, loosen clothing, cool with wet cloths, sip water |
| Heat stroke | Confusion, very high body temperature, hot skin, possible collapse | Call emergency services, cool the person quickly, stay with them |
| Mild hypothermia | Shivering, fumbling hands, slurred speech, poor judgment | Get out of wind and wet, add dry layers, give warm sweet drinks if alert |
| Severe hypothermia | Shivering stops, confusion, drowsiness, unresponsiveness | Call emergency services, handle gently, insulate and protect from cold |
These conditions can develop on any hike in the wrong weather. For more detail, see our guides on heat safety for hikers and how to prevent hypothermia on the trail. The CDC also explains the signs of heat related illness and hypothermia.
How do you handle stings, bites and allergic reactions?
Handle stings, bites and allergic reactions by removing the source if safe, cleaning the area and watching closely for signs of a severe reaction. Swelling of the face or throat, trouble breathing, hives spreading across the body or dizziness after a sting can signal anaphylaxis, which is a medical emergency. Call for help immediately.
Insect stings
Move away from the insects. If a stinger is left in the skin, remove it promptly, for example by scraping it out. Clean the area and use a cold cloth to reduce swelling.
Severe allergic reactions
If someone has a prescribed epinephrine auto-injector, help them use it according to its instructions and call for emergency help. Anyone with a known severe allergy should carry their own prescribed medication and tell hiking partners where it is.
Tick bites
The CDC advises removing an attached tick with fine-tipped tweezers, grasping it close to the skin and pulling upward with steady, even pressure, then cleaning the area. Watch for a rash or fever in the following weeks and see a doctor if either appears.
Snakebites
Call for emergency help, keep the person calm and as still as possible, and remove rings or tight items near the bite. Do not cut the wound, try to suck out venom, or apply ice. Our guide on wildlife safety on the trail covers how to avoid encounters in the first place.
What should a hiking first aid kit include?
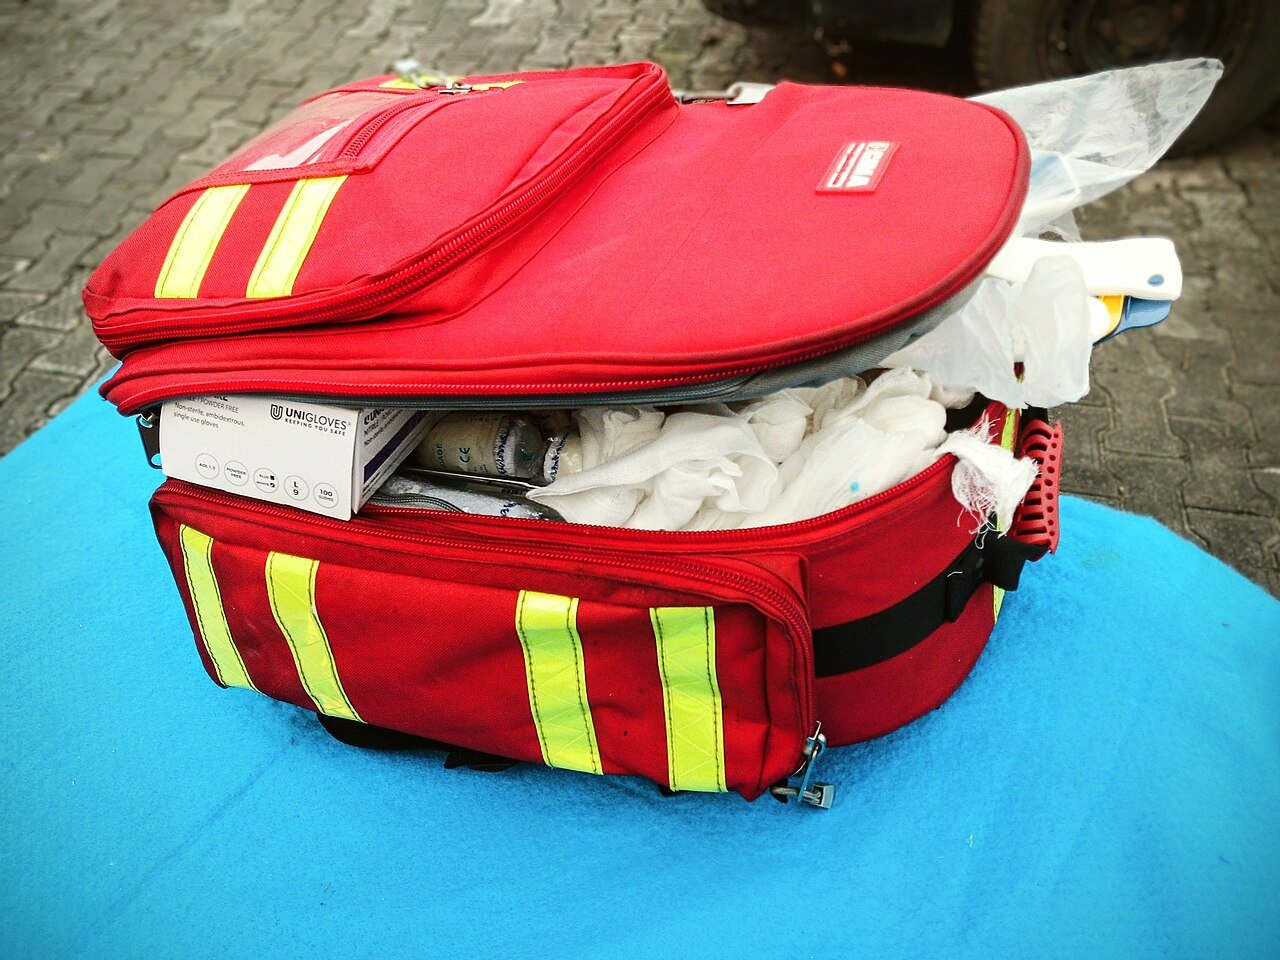
A hiking first aid kit should include supplies for blisters, wounds, bleeding, sprains and personal medications, plus gloves, tweezers and an emergency blanket. Tailor it to trip length, group size and the environment. A small, well-organized kit you know how to use is more valuable than a large one you never open.
| Category | Items |
|---|---|
| Blisters | Moleskin, blister dressings, tape |
| Wounds | Adhesive bandages, sterile gauze, wound closure strips, antiseptic wipes |
| Bleeding | Gauze pads, pressure bandage, gloves |
| Sprains | Elastic bandage, triangular bandage, tape |
| Tools | Tweezers, small scissors, safety pins, irrigation syringe |
| Warmth | Emergency blanket |
| Personal | Your own prescribed medications, allergy medication if advised by your doctor |
| Information | Small first aid guide, emergency contacts |
Check your kit before each season and replace anything used or expired. For a printable list, see our travel first aid kit checklist.
Common first aid mistakes on the trail
The most common first aid mistakes on the trail are ignoring hot spots, skipping wound cleaning, moving someone who may have a spine injury, delaying a call for help and forgetting to keep an injured person warm. Others include carrying a kit you do not know how to use and not telling anyone your plans before a hike.
- Walking on hot spots until they turn into deep blisters
- Covering a dirty wound without rinsing it first
- Moving an injured person who might have a head, neck or back injury
- Waiting too long to call for help because you hope things will improve
- Letting an injured person get cold while waiting
- Carrying medications nobody in the group knows about
- Not checking the kit for missing or expired items
- Forgetting your own safety while helping someone else
How can hikers learn wilderness first aid?
Hikers can learn wilderness first aid through hands-on courses that focus on remote settings, longer care times and improvised equipment. The American Red Cross offers wilderness and remote first aid training, and other outdoor schools and clubs run similar courses. A standard first aid and CPR course is a strong starting point for day hikers.
Courses vary in length and depth. A basic first aid and CPR class teaches emergency response and is useful for anyone. Wilderness first aid courses add skills for situations where help is far away, such as long-term patient care, splinting with improvised gear and evacuation decisions.
Tip: Practice with your own kit. Open it at home, take out each item and make sure you know what it is for. In an emergency, familiarity saves time.
Frequently asked questions
What is the most common injury on a hike?
Blisters, sprained ankles, cuts and scrapes are among the most common problems hikers face. Most are minor and can be managed with basic first aid and the right supplies. Treating hot spots early, watching your footing on uneven ground and wearing well-fitted footwear help prevent many of these injuries before they start.
What should you do if someone gets hurt on a hike with no signal?
If someone is hurt and you have no signal, keep them safe and warm, give basic first aid and try sending a text, which sometimes gets through. Use a satellite messenger or beacon if you carry one. Otherwise, send at least two people for help with a written note of the location and injury.
Should you pop a blister while hiking?
Many first aid sources suggest leaving a blister intact when possible, because the skin protects against infection. Cover it with padding or a blister dressing to reduce friction. If it tears, clean it gently and cover it with a sterile dressing. See a doctor if signs of infection appear, such as spreading redness or pus.
Do you need a wilderness first aid course to go hiking?
You do not need a wilderness first aid course to go hiking, but it is strongly worth considering if you hike often, lead groups or travel far from roads. A standard first aid and CPR course is a good start for day hikers. Wilderness courses add skills for longer waits and remote settings.
When should you call 911 on a hiking trail?
Call 911 or your local emergency number for heavy bleeding, trouble breathing, chest pain, unresponsiveness, suspected head, neck or back injury, a possible fracture that prevents walking, signs of heat stroke, severe hypothermia or a severe allergic reaction. If you are unsure whether something is serious, call. Dispatchers can help you decide.
Sources and further reading
- American Red Cross first aid training
- Centers for Disease Control and Prevention
- National Park Service
- Stop the Bleed
Featured photo: ABORISADEADETONA via Openverse (CC0).