On this page
The best outdoor photography tips for hikers are simple: shoot in soft morning or evening light, build each photo around a clear subject with something interesting in the foreground, and keep your camera or phone easy to reach so you actually use it. Protect your gear from rain and dust, stay on the trail and never risk your safety for a shot.
Hiking puts you in front of great scenes, but trail photos often come out flat, hazy or crooked. The good news is that better pictures depend far more on light, composition and habits than on expensive equipment. These tips work with a phone or a camera and fit naturally into a normal day hike.
Key takeaways
- Plan hikes around early morning or late afternoon light whenever you can.
- Use a strong foreground, such as rocks, flowers or a trail curve, to add depth to landscapes.
- Include people for scale and story, and ask permission before photographing strangers.
- Keep your phone or camera in an easy to reach spot, protected from rain and knocks.
- Carry a charged spare battery or power bank, because cold and GPS apps drain power fast.
- Stay on trails, keep your distance from wildlife and never stand near edges for a photo.
Why do so many hiking photos look disappointing?
Many hiking photos look disappointing because they are taken in harsh midday light, lack a clear subject or try to fit an entire view into one frame. The eye sees depth, scale and color that a camera flattens. Fixing light, choosing one subject and adding a foreground solves most of these problems quickly.
Big mountain views often shrink into a thin strip of hills in a photo. Bright sky and dark forest in the same frame can turn into a white sky and black trees. Understanding why helps you take better shots without extra gear.
Photography is also a great way to slow down and notice more on a hike. If you enjoy it, it pairs well with other hobbies in our list of beginner outdoor activities to try.
1. Shoot in the best light of the day
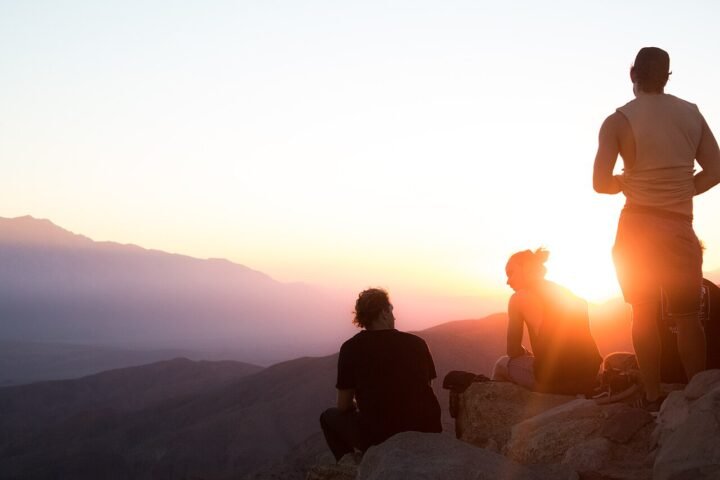
The best light for hiking photography usually comes in the hour or so after sunrise and before sunset, often called golden hour. The sun is low, shadows are long and colors look warm and soft. Overcast days also work well for forests, waterfalls and close up shots because clouds soften harsh shadows.
Midday sun is the hardest light to work with. It creates strong contrast, washes out colors and puts deep shadows under hat brims.
| Light | What it looks like | Best subjects |
|---|---|---|
| Golden hour | Warm, soft, long shadows | Landscapes, portraits, ridgelines |
| Blue hour | Cool, even, glowing sky | Silhouettes, lakes, city lights from a summit |
| Overcast | Soft, no harsh shadows | Forests, waterfalls, flowers, people |
| Midday sun | Bright, high contrast | Water reflections, deep canyons, bold shapes |
| Fog or mist | Muted, layered, moody | Trees, valleys, simple compositions |
If you must shoot at midday, look for shade, turn so the sun is behind or beside you and focus on details instead of wide views.
Tip: If you plan to stay out for sunset photos, pack a headlamp and know your route out in the dark. Light fades quickly once the sun drops.
2. Find a clear subject for every photo
Every strong hiking photo starts with a clear subject, the one thing you want the viewer to notice first. It could be a peak, a lone tree, a hiker on the trail or a waterfall. Decide what it is before you press the shutter, then move until that subject stands out against a simple background.
Ask yourself one question before each shot: “What is this photo about?” If the answer is “everything,” the photo will likely feel busy.
Ways to make the subject stand out:
- Move closer so it fills more of the frame.
- Change your angle to place it against open sky or a plain slope.
- Use contrast, such as a bright jacket against green trees.
- Remove distractions at the edges by stepping left or right.
3. Use foreground to add depth
Foreground adds depth to hiking photos by giving the eye a starting point before it travels into the scene. Rocks, wildflowers, a curving trail, tree branches or a stream in the bottom of the frame make a flat view feel three dimensional. Crouch down and move closer to the foreground to make the effect stronger.
This is one of the quickest ways to improve landscape photos. Instead of standing at a viewpoint and shooting straight out, look around your feet for something that leads into the view.
Good foreground ideas on the trail:
- A winding path that leads toward a peak
- Rocks or boulders in a stream
- Wildflowers along the trail edge
- A tree trunk or branches framing the view
- Footprints in snow or sand
4. Use simple composition rules
Simple composition rules help hiking photos feel balanced. The rule of thirds places your subject or horizon off center, along imaginary lines that split the frame into thirds. Leading lines, such as trails, rivers and ridges, guide the eye. Keep horizons straight and give your subject some space in the direction it faces.
Most phones and cameras can show a grid on screen. Turn it on and use it to:
- Place the horizon on the lower or upper third line, not the middle.
- Put your subject where two grid lines cross.
- Check the horizon is level before you shoot.
- Follow a line such as a trail or river from the edge of the frame toward your subject.
- Leave space in front of a hiker who is walking or looking into the scene.
Rules are guides, not laws. A perfectly centered reflection in a still lake can look great. Learn the rules first, then break them on purpose.
5. Include people for scale and story
Including people in hiking photos shows scale and adds story. A small figure on a ridge shows how big the mountain is, while a hiker crossing a stream shows what the day felt like. Ask your hiking partners to walk ahead naturally rather than posing, and place them where they balance the scene.
Tips for photographing people on the trail:
- Ask companions to wear a bright color that stands out against the landscape.
- Shoot from behind as they walk into the view for a natural look.
- Get closer for candid moments at lunch stops or summits.
- Ask permission before photographing other hikers, and respect a no.
- Avoid blocking narrow trails or viewpoints while you set up a shot.
On busy trails, be patient and quick. Our guide on how to hike responsibly on busy trails covers trail etiquette that applies to photographers too.
6. Get the most from your phone camera
You can get great hiking photos from a phone camera by cleaning the lens, tapping to set focus and exposure, using the grid, shooting in good light and avoiding digital zoom where possible. Most phones handle wide landscapes well. Walking closer instead of zooming, and using the phone’s built in modes for low light or portraits, also helps.
Phone tips for the trail:
- Wipe the lens before shooting. Fingerprints cause haze and soft photos.
- Tap to focus on your subject, then slide to adjust brightness if the screen allows it.
- Use the main or wide lens rather than heavy digital zoom.
- Try HDR in high contrast scenes, if your phone offers it.
- Hold steady with both hands, or brace against a rock or trekking pole.
- Shoot a few frames of each scene so you have options.
If you hike with a dedicated camera, the same principles apply. Choose a camera you are happy to carry, because the one left at home takes no photos.
7. Protect your camera or phone on the trail
Protecting your camera or phone on the trail means keeping it dry, dust free, secure and charged. Use a waterproof bag or case in rain, a padded pouch on your hip or pack strap for quick access and a wrist strap near water or edges. Cold drains batteries quickly, so carry a spare and keep it warm.
| Risk | How to protect your gear |
|---|---|
| Rain and splashes | Waterproof pouch, dry bag or rain cover |
| Dust and sand | Lens cloth, sealed bag, avoid lens changes in wind |
| Drops | Wrist strap, lanyard or secure clip |
| Cold | Spare battery kept in an inside pocket |
| Heat | Keep out of direct sun in a closed car or tent |
| Low battery | Power bank and cable in your pack |
Your phone may also be your map and emergency device, so do not let photography drain it completely. Carry a power bank and consider switching to airplane mode while still using the camera. Our guide to travel tech essentials, chargers, adapters and power banks explains what to look for.
8. Photograph wildlife from a safe distance
Photographing wildlife on a hike safely means staying well back, using zoom instead of approaching and never feeding, chasing or cornering animals. If an animal changes its behavior because of you, you are too close. Many parks set minimum distances for certain animals, so check local rules before you go and always follow them.
Simple rules for wildlife photos:
- Use your zoom or crop later rather than walking closer.
- Stay on the trail and keep your group together.
- Move away slowly if an animal approaches you.
- Never use food or calls to attract animals.
- Be extra careful around animals with young.
Our guide to wildlife safety on the trail explains what to do if you meet larger animals. If birds catch your attention most, our birdwatching for beginners guide is a natural next step.
9. Look for details, not just big views
Detail shots make hiking photo sets richer and are often easier to capture well than big landscapes. Look for patterns in bark, frost on leaves, mushrooms, lichen on rocks, footprints or textures in sand and snow. Get close, fill the frame and look for soft, even light. These photos also work well on cloudy or midday hikes.
Details help tell the story of a hike in a way that wide views cannot. A muddy boot, a trail sign or a steaming cup at a summit all add character.
If you enjoy looking closely at small things outdoors, try geocaching for beginners, which turns exploring into a treasure hunt and offers plenty of interesting photo spots along the way.
10. Stay safe and leave no trace
Staying safe and leaving no trace means never risking your footing for a photo, staying on durable trails and leaving places as you found them. Do not climb barriers, step near unstable edges or wade into fast water for an angle. Avoid trampling plants, and pack out everything, including small items like lens wipes.
Photographers can sometimes get absorbed and forget their surroundings. A few habits help:
- Stop walking before you look at your screen or viewfinder.
- Check behind you before stepping backward.
- Keep away from cliff edges, wet rocks and wildlife.
- Respect closures and private property.
- Think twice before sharing exact locations of fragile spots.
What are the most common hiking photography mistakes?
The most common hiking photography mistakes are shooting only at midday, tilted horizons, no clear subject, dirty lenses, relying on digital zoom and draining the phone battery needed for navigation. Each one is easy to fix with small habits, such as wiping the lens, using a grid and carrying a power bank.
- Midday only: Plan at least part of the hike around softer light.
- Crooked horizons: Turn on the grid and check before you shoot.
- Too much in the frame: Pick one subject and move closer.
- Smudged lens: Wipe it every time you take your phone out.
- Heavy zoom: Walk closer or accept a wider shot.
- Dead battery: Carry a power bank and protect your navigation power.
Your next step
On your next hike, set yourself one small challenge: take three photos that use a strong foreground and three that include a person for scale. Then explore other ways to enjoy time outside, such as how to start cycling outdoors, or read why time outdoors is good for you for more reasons to keep heading out.
Frequently asked questions
Do I need a professional camera for hiking photography?
You do not need a professional camera for good hiking photography. Modern phones take excellent landscape photos in good light. Light, composition and timing matter much more than equipment. If you later want more zoom or better low light performance, a dedicated camera can help, but start with what you already carry.
What is the best time of day for hiking photos?
The best time of day for hiking photos is usually golden hour, the hour or so after sunrise and before sunset, when light is soft and warm. Overcast days are also good for forests and waterfalls. Midday sun is the hardest light, so use it for details, shade or strong shapes instead.
How do I keep my phone battery alive for photos on a hike?
To keep your phone battery alive on a hike, start fully charged, carry a power bank and cable, lower screen brightness and close apps you are not using. Airplane mode saves power while still letting you take photos. In cold weather, keep the phone and spare battery in an inside pocket.
How do I take better photos of mountains?
To take better photos of mountains, shoot in early or late light, add a foreground such as rocks or flowers, include a person for scale and place the horizon off center. Avoid heavy zoom, which can make images soft. Walking a short distance to a new angle often makes a bigger difference than settings.
Featured photo: indiraramguz via Openverse (CC0).